UDISE+ Step-by-Step Tutorial 2025-26
A complete text-based walkthrough to guide you through every stage of the UDISE+ data entry process — from login to final submission.
About This Tutorial
The Unified District Information System for Education Plus (UDISE+) requires every recognised school in India to submit detailed data annually. This tutorial walks you through the entire process — step by step — so you can complete your submission accurately and on time for the 2025-26 academic year. Whether you are a first-time user or need a refresher, follow each section carefully to avoid errors and rejections during the block-level verification stage.
Section 1: Before You Begin — What You'll Need
Before you start filling the UDISE+ Data Capture Format (DCF), make sure you have the following items ready. Gathering everything in advance will help you complete the form in one session and reduce the risk of errors or data loss.
Login Credentials
- 11-digit UDISE+ School Code — This is your unique school identifier issued by the district education office. If you don't know your code, check the official UDISE+ portal or contact your Block Education Officer (BEO).
- Password — The password set during registration or the most recent reset. If you've forgotten it, use the Password Reset Guide before proceeding.
- Registered Mobile Number — OTP verification is mandatory during login. Keep the phone linked to your UDISE+ account nearby so you can receive the one-time password promptly.
Browser & Technical Requirements
- Use the latest version of Google Chrome or Mozilla Firefox. Other browsers may cause display issues or form submission failures.
- Ensure you have a stable internet connection — at least 2 Mbps is recommended. Unstable connections can cause data loss mid-session.
- Disable any pop-up blockers for the
udiseplus.gov.indomain, as the portal may open verification windows or download links in new tabs. - Clear your browser cache if you experience loading issues or see outdated page elements.
Documents to Keep Ready
- Enrollment Registers — Class-wise, section-wise student counts as on the reference date (typically September 30). Break them down by gender and social category (SC/ST/OBC/General).
- Teacher List — Full details of all teaching and non-teaching staff including qualifications, date of joining, subjects taught, and training certificates (BEd, DEd, etc.).
- Infrastructure Details — Count of classrooms, labs, libraries, computer rooms, toilets (boys/girls/staff), drinking water sources, ramps, and playground availability.
- School Photographs — Recent photographs of the school building (front view), at least one classroom, and the playground. Photos must be in JPEG/PNG format, under 2 MB each.
- Affiliation & Recognition Documents — School recognition order, affiliation certificate, and management type proof.
Recommended Timing
The UDISE+ portal experiences heavy traffic between 10:00 AM and 2:00 PM IST during the filing window. To avoid slow loading and session timeouts, try to work during off-peak hours — early morning (6:00–9:00 AM) or late evening (7:00–11:00 PM). Weekends also tend to be less congested.
Section 2: Step-by-Step UDISE+ Data Entry Process
Follow these ten steps in order. Do not skip any step, and remember to save your progress after completing each section.
Step 1: Visit the UDISE+ Portal
Open your browser and go to udiseplus.gov.in. On the homepage, locate and click the "Login" button in the top-right corner. You will be redirected to the school login page. Do not use the student or teacher login — use the School Login option specifically.
Step 2: Enter School Credentials & OTP
Type your 11-digit UDISE school code in the username field and enter your password. Click "Get OTP" — a 6-digit code will be sent to your registered mobile number. Enter the OTP within 5 minutes and click "Login". If the OTP doesn't arrive, check our OTP Issues Guide for troubleshooting tips.
Step 3: Navigate to Data Capture Format (DCF)
After logging in, you'll land on the school dashboard. Look for the "Data Capture Format" or "DCF" link in the left-side menu or the main dashboard area. Click it to begin the data entry process. The DCF is divided into multiple tabs/sections — you must complete all mandatory sections before final submission.
Step 4: Fill the School Profile Section
This is the first section of the DCF. Enter or verify your school name, full postal address, pin code, management type (Government, Private Aided, Private Unaided, etc.), school category (Primary, Upper Primary, Secondary, Higher Secondary, or composite), medium of instruction, year of establishment, and affiliation details. Many of these fields may be pre-populated from last year — carefully verify and update where necessary. Click "Save & Next" when done.
Step 5: Fill the Enrollment Section
Enter class-wise and gender-wise student counts as on the reference date. You must provide separate totals for boys and girls in each class (Class 1 through 12, plus pre-primary if applicable). Additionally, fill in the category breakup — SC, ST, OBC, and General — for each class. The portal automatically calculates totals; make sure the grand total matches your enrollment register exactly. Any mismatch will trigger a validation error during submission.
Step 6: Fill the Teacher Section
Enter the total count of teaching staff, then add individual details for each teacher: name, gender, date of birth, educational qualifications (graduation, post-graduation), professional qualifications (BEd, DEd, MEd), classes and subjects taught, date of appointment, and training status. You also need to indicate whether each teacher is regular, contractual, or part-time. For schools with many teachers, consider using the bulk upload template if available.
Step 7: Fill the Infrastructure Section
Report detailed infrastructure data: total number of classrooms (pucca, semi-pucca, kutcha), additional rooms (library, computer lab, science lab, staff room), toilet facilities (separate counts for boys, girls, and CWSN-friendly toilets), drinking water source (tap, hand pump, well, etc.), availability of electricity, internet connectivity, playground, boundary wall, ramp for disabled access, and kitchen shed for mid-day meals. Enter accurate counts — inspectors may physically verify these during block visits.
Step 8: Upload Photographs
The UDISE+ portal requires you to upload at least two photographs: a front view of the school building and an interior classroom photo. Some states also require a playground or lab photo. Ensure each image is in JPEG or PNG format, under 2 MB in size, clearly visible, and recent (taken within the current academic year). Blurry, outdated, or unrelated images may lead to rejection during verification.
Step 9: Review & Validate All Sections
Before submitting, go back through every section and review the data you've entered. The portal has a built-in validation checker — click "Validate" to run it. It will flag missing mandatory fields, logical inconsistencies (e.g., more teachers than classrooms, enrollment numbers that don't add up), and formatting errors. Fix all flagged issues before attempting final submission. Print or screenshot each section for your records.
Step 10: Submit and Generate Receipt
Once all sections pass validation, click the "Final Submit" button. You will see a confirmation dialog — read it carefully and confirm. After successful submission, the portal generates a submission receipt with a unique reference number. Download this receipt as PDF and save it — you will need it as proof of submission and during the block-level verification process. Note: once submitted, you cannot edit your data unless the block officer sends it back for correction.
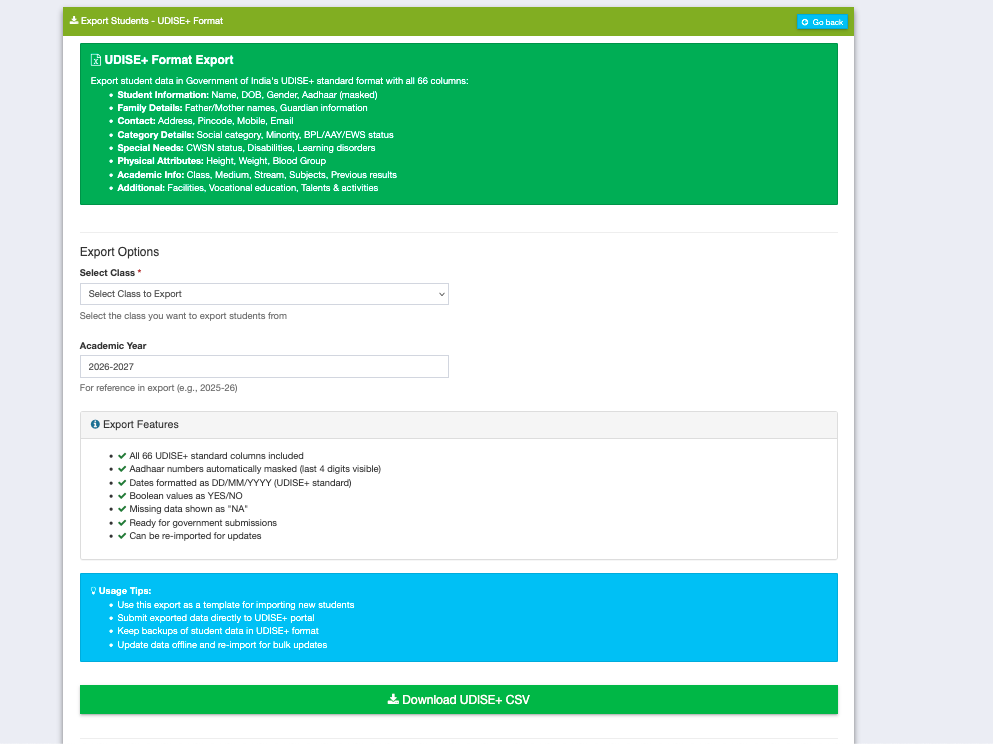
🚀 Skip the Data Entry Hassle
With Schoolites, your student and teacher data is always UDISE-ready. One click export, zero manual entry.
Section 3: Common Mistakes to Avoid
Even experienced users make these mistakes. Review this list before you begin your data entry to save yourself from rework and delays.
| Mistake | Why It's a Problem | How to Avoid |
|---|---|---|
| Enrollment totals don't match class-wise sums | The portal's validation engine compares the grand total against the sum of individual class entries. A mismatch triggers an error that blocks submission. | Cross-check totals in a spreadsheet before entering data. |
| Forgetting to upload mandatory photographs | Missing photos cause the submission to be flagged as incomplete. Block officers may reject the entire entry and send it back for correction. | Prepare and resize photos before starting data entry. |
| Not saving after each section | Session timeouts (typically 15–20 minutes of inactivity) will cause unsaved data to be lost entirely, forcing you to re-enter everything from scratch. | Click "Save" or "Save & Next" after completing each tab. |
| Working during peak hours | Heavy server load between 10 AM–2 PM causes slow page loads, frequent timeouts, and failed save operations. You may lose hours of work. | Use early morning (6–9 AM) or late evening (7–11 PM) slots. |
| Using outdated browser or mobile browser | The UDISE+ portal uses modern JavaScript features. Older or mobile browsers may not render forms correctly, leading to missing fields or submission errors. | Always use the latest Chrome or Firefox on a desktop/laptop. |
| Entering previous year's data without updating | Pre-filled fields from last year may be outdated. Submitting without updating leads to incorrect records and potential audit flags. | Verify every pre-filled field against current records. |
Section 4: After Submission Checklist
Submission is not the end of the process. Follow these post-submission steps to ensure your data is accepted and verified without issues.
Download Submission Receipt
Immediately after submission, download the receipt as a PDF file. This receipt contains your unique submission reference number, date, and a summary of the data submitted. Store it safely — both as a digital file and a printed copy.
Save a Copy of All Entered Data
Take screenshots or printouts of every section of the completed DCF form. This serves as a backup in case you need to re-enter data after a block officer sends it back for correction. You can also export section summaries from the dashboard if available.
Wait for Block Verification
After you submit, your data goes to the Block Education Officer (BEO) for verification. This process may take 7–15 working days depending on your state. Do not make changes during this period unless the BEO specifically sends the form back to you for corrections.
Check for Correction Requests
Log in to the UDISE+ portal weekly after submission to check whether the BEO has flagged any data for correction. You will see a notification or a status change on your dashboard. If corrections are requested, address them promptly — delaying may cause your school to miss the verification deadline.
Quick Reference: Important Links
UDISE+ Data Entry — Frequently Asked Questions
For a school with up to 500 students and 20 teachers, the entire DCF data entry typically takes 2 to 4 hours if you have all documents ready beforehand. Larger schools with more teachers and higher enrollment may need 4 to 6 hours. We recommend completing it in one sitting to avoid session-related issues, but you can save your progress and return later if needed.
No, once you click "Final Submit," the data is locked for block-level verification. You cannot edit it on your own. However, if the Block Education Officer (BEO) finds discrepancies, they can send the form back to your school for corrections. In that case, you will see a notification on your dashboard and can make the required changes within the correction window.
The reference date for enrollment data is typically September 30 of the current academic year. All student counts — class-wise, gender-wise, and category-wise — must reflect the actual enrollment as on this date. Do not include students who joined after this date or those who dropped out before it.
Missing the deadline can have serious consequences. Your school may be marked as non-compliant, which can affect government grants, recognition renewal, and eligibility for various schemes. Some states offer a brief extension window, but this is not guaranteed. Check the UDISE+ Deadline page for the latest dates and always aim to submit at least one week before the final date.
The DCF form primarily requires aggregate totals — class-wise, gender-wise, and category-wise counts. You do not need to enter individual student names or roll numbers in the main DCF. However, some states may require individual student data entry through a separate module (Student Data Capture Format). Check with your district education office for state-specific requirements.
🚀 Skip the Data Entry Hassle
With Schoolites, your student and teacher data is always UDISE-ready. One click export, zero manual entry.
Automate Now
Trusted by 1000+ schools
Simplify Your UDISE+ Data Entry
Schoolites keeps your school data organised year-round. When the UDISE+ window opens, export a ready-to-upload DCF in one click — no manual entry, no errors.